Blog: Home Improvement

Bolt and Brace Retrofits: 20% discount on Homeowners Insurance

Homes with qualifying brace and bolt retrofits may be eligible for discounts of up to 20 percent on California Earthquake Authority insurance premiums. More than 1.2 million houses in high-hazard areas of California are particularly vulnerable to earthquakes by virtue of when and how they were constructed: typically before 1979, with a wood frame on a raised foundation, and with a cripple wall in the crawlspace under the house.

Do’s and Don’ts of Finishing a Basement

DO start with a detailed plan. Measure out the basement and mark any items that cannot be moved, such as a furnace, water heater or pipes. Think about ways you plan to arrange furniture and consider all of the possible uses for the room. Will it be a home theater? Will someone be sleeping down there? Each scenario will require certain amenities and safety requirements.

DON’T plan to finish the entire basement. Doing so will leave you without a storage or utility area where you house holiday decorations, tools, luggage and similar items.

DO get the scoop on building codes. Knowing what your municipality allows in basement remodeling will help you customize a plan that is functional, safe and legal. It pays to follow the chain of command and secure permits while having all work inspected.

DON’T overlook adequate lighting in your plan. A basement is an area of the house that often has limited natural light pouring in. With traditionally small windows, or no windows at all, a basement needs ample lighting in its design scheme. This may include a combination of overhead and task lighting. Ample lighting will help the room feel like part of the house.

DO take into consideration moisture issues in the basement. Many basements are plagued by moisture issues ranging from water seepage to condensation forming on walls. Certain materials may need to be used to mitigate water issues before finishing can take place. It is essential to have a professional assess the basement water issues prior to starting any finishing work.

DON’T simply cover up potential hazards, such as mold or mildew. Have them treated instead. Otherwise, you could have a breeding ground behind drywall that could lead to unsafe conditions in the home.

DO have a radon test. Radon is a hidden killer that can cause lung cancer. Because it occurs naturally in the soil and water surrounding a home and is impossible to detect without a specialized test, many people are unaware of the presence of radon until it is too late. If you have radon, install a radon remediation system.

DON’T limit furniture choices to one type. You may need to be flexible in your furniture choices, even selecting modular pieces, like sectionals, because entryways to basements may have small doorways or obstructions that make adding furniture more challenging.

DO keep the possibility of flooding in mind. Homes that are near waterways or at low elevation may be at risk of flooding. If you have a risk of flooding and decide to move ahead, take precautionary measures; keep electrical wiring up higher and use a more water-resistant flooring material, like tile. Put important electronics and items on shelves so they are not at ground-level.

Finishing a basement is a job that can add a lot of usable space to a home. Go about the project in the right way to keep within budget and have a room that is safe and functional. 

Proven Ways to Increase Home Value

Make your house more efficient, adding square footage, upgrading the kitchen or bath and installing smart-home technology to help increase its value. If, like most homeowners, you believe your house is your biggest asset, taking care of it is probably a top priority. Keeping up with repairs and making smart improvements are proven ways to increase home value over time.


Use the tips below to raise the value of your home.


Make it More Attractive


Curb appeal, how your home looks from the street is your first chance to make a good impression. A home’s exterior needs to make a prospective buyer want to walk through the front door. Make sure existing landscaping is well-maintained and exterior of the home looks good. Once the exterior looks good, focus on the kitchen and bathroom to increase the value of the home.


Make the Home Low-maintenance


Improvements that make things easy to clean and maintain may also increase home value and reduce new buyer’s maintenance concerns. Replace an old furnace or water heater or even replace the roof. Consider replacing easily stained carpet with hardwood floors or replace high-maintenance wood siding with vinyl siding.


Improve Energy Efficiency


Energy conservation features can have a significant impact on home value. Consider double-paned windows, enhanced attic insulation, LED lighting and efficient appliances as a way to increase home value and entice energy-conscious buyers. Of course, solar panels on the roof are a major energy efficiency improvement that most buyers are looking for.


Add the Space


Price per square foot is one-way people compare homes that are similar in style and upgrades. Adding square footage has a huge impact on value. Adding a room is the obvious way to make your house bigger, but you can also create additional living space by finishing a basement or building a deck.


Add Smart Home Features


Safety-enhancing gadgets top the list of “smart” technologies buyers want in their new home, including smart thermostats, fire detectors, carbon monoxide detectors, security cameras, door locks and lighting. For as little as $1,000, you can make your home more appealing to tech minded buyers.

Commercial Tenant Improvement Terminology

We work closely with tenants, landlords, investors and commercial real estate brokers on commercial tenant improvement projects.  

There are several different types of commercial improvements projects:

  • Interior Improvements
  • Landlord Improvements
  • Tenant Improvements

Since the terms can be confusing, we offer the following definitions of Interior Commercial Improvements.

Interior Improvements:

Modifications of a commercial space made by either the building owner or tenant. Interior improvements are the customized and/or standardized alterations a building owner and/or tenant makes to commercial space prior to a lease or as part of a lease agreement. These include changes to walls, floors, ceilings, and lighting.

Landlord Improvements:

Modifications of a commercial space made by the building owner prior to tenant improvements. Landlord improvements, also known as white box improvements, are the standardized alterations a building owner makes to commercial space prior to a lease agreement, in order to configure the space for quick turn over to a tenant for Tenant Improvements. These include changes to walls, floors, ceilings, and lighting.

Tenant Improvements:

Modifications of a commercial space made by either the building owner or tenant in order to configure the space to accommodate the specific requirements of the tenant. Leasehold improvements, also known as tenant improvements, are the customized alterations a building owner makes to commercial space as part of a lease agreement, in order to configure the space for the needs of that particular tenant. These include changes to walls, floors, ceilings, and lighting. The most used term is Tenant Improvement, abbreviated as TI.

Early Dry Rot Detection

Whenever possible, inspect for any signs of dry rot. Early detection is key to keeping dry rot repairs as inexpensive as possible. When you know what to look for you can save time and money by stopping the rot and keeping your home investment in tip-top shape.


Identifying Dry Rot


Dry rot can happen to even relatively young houses, so check your home annually. The risk of dry rot exists where ever wood and water meet, the longer the area takes to dry, the higher the risk. Take a clipboard, pen, flashlight, and flat-head screwdriver to test any suspicious areas in a systematic search.


Look at any horizontal wood, like facia boards and windowsills, anywhere wood meets concrete, and pay particular attention to wood joints. Look for any signs of wood rot or water damage in areas of your home where the wood looks dark.


Check for blistering, cracking or peeling paint, as well as exposed end grain wood that can wick up moisture from concrete. Check anywhere that wood is close to dirt or where greenery sits against the house. Fungus spores accelerate wood rot, so be on the lookout for white, gray, orange or green algae growing in these places. Test with the screwdriver. If there’s any give to the density of the wood, you’ve found rot. Use your clipboard and camera to document where you discover dry rot and estimate the extent of the damage. If you find rot, now is the time to stop it.


Hopefully, any dry rot you find will be in the early stages and easily treated. If dry rot is advanced, it can spread to structural framing and require replacement of entire pieces of framing.

Tips for Cleaning Stucco

Stucco lasts from 50 or 80 years. In order to live out its expected lifespan successfully, stucco tends to require a modest amount of care and attention. For indoor stucco, a new paint job may be all it needs. But, with exposure to the beating summer sun, the howling winds of winter, and simply the dirt and dust kicked up by passing traffic, it’s only a matter of time before stucco siding needs minor repair or, at the very least, a simple cleaning.


Simple cleaning may be all your exterior stucco needs if not repairs are necessary. Cleaning indoor stucco usually takes nothing more than water and a bit of elbow grease. Simply scrub the stucco with a dampened nylon brush to saturate the surface, then rub away the buildup with a moistened microfiber cloth (or clean cotton rag).


In extreme cases with deep stains, experts recommend a chemical solution known as trisodium phosphate, or TSP. Available at most home centers, be advised that safe use TSP requires that you take proper precautions. Ventilate the area by opening windows and running a fan. When working, wear the right gear (rubber gloves, protective eyewear, and long-sleeve clothing).


Combine the TSP with water in a bucket, diluting to water-to-TSP ratio of 15 to 1. Apply the TSP to the affected area by means of a nylon brush and allow the stucco an hour or two to dry.


Outdoor stucco tends to get a lot dirtier and requires more frequent cleaning. Use a garden hose (equipped with a spray nozzle) or a power washer (on its lowest setting). First, with your chosen tool set to spray in a mist formation, saturate the stucco from bottom to top. Then, switch to a more concentrated spray and proceed to clean from top to bottom. After spraying, check the stucco for any lingering buildup and if you encounter any buildup, dislodge it with a stiff-bristle brush, being careful not to scrub so vigorously that you grind down the stucco. If blemishes still remain on the siding, apply diluted TSP with a pump sprayer or a hose wand with a built-in soap reservoir. Allow sufficient time for the stucco to dry and finish up by rinsing the stucco surface one last time.


Save Energy Costs with New Windows

About 25% of the costs for heating and cooling your home or office comes from the energy lost through your windows. Careful selection of the right type of window for your home or office could save you thousands of dollars in energy costs while increasing resale value.

Call us today at (650) 400-3600 to discuss your energy saving window replacement project.

Exterior Home Remodeling Ideas

How the exterior of your home looks and functions dictates a large part of its value. Match your home’s exterior to its architectural style to make it look good. Check out these exterior home remodeling and renovation ideas to keep your home looking its best.

Replace Shutters or Windows

Generic-style fixed / non-functional shutters are often unattractive. There are many stylish shutters available today including country and mid-century modern styles that can enhance a home’s curb appeal. Use shutter styles that complement the home’s exterior architecture.
Consider enlarging your windows, adding a bay or picture window, or simply changing the size and shape of your existing windows to add dimension to your exterior and more interior light.

Install Fiber Cement Siding

Improve your home’s appearance both now and for the future, replace your existing siding with fiber cement. Fiber cement siding is a versatile material available in multiple styles and colors. It’s exceptionally durable and low maintenance.

Fresh Coat of Paint

Update the color of your home to something a little lighter, brighter, or more contemporary to enhance its style. Pair the color of your home with its architectural style to the get the best results, for example, a slightly darkened paint color on Victorians, a saturated color palette on an Arts and Crafts home, or a natural color palette on a Tudor. Use a bold color accent on the front door, shutters, trim, or decorative woodwork. Make sure the colors complement the rest of your home’s exterior and use accent colors in small amounts so as not to overwhelm the rest of the home’s palette.

Accent The Exterior

Siding: Vary siding colors or materials to call attention to different areas of your exterior, such as upper stories, eaves, towers, or attached sections like garages or barns to give your entire property a style boost. Exterior Texture: Add a brick or stone veneer skirt, an accent wall, some cedar or cedar-look shingles, or stucco.

Update Your Roof

Your roof plays a big role in how your home looks and functions. If your roof is getting older, Consider replacing an older roof with architectural shingles designed to help reflect UV rays to keep your home cooler. In areas with frequent hail storms, consider using a standing seam metal or concrete roof tiles.

Add a Porch

Porches are listed as one of the most wanted home features. Make sure your porch addition has enough space to include seating and other functional options, such as fans, fire pits or storage.

Upgrade Landscaping

Add some well-placed shrubs and plants up against your house to hide gas or electrical meters, or other non-attractive elements. Take care not to cover windows or light sources as you plant.

Add Exterior Lighting

Add sconces, over the door lights, and accent lights to help illuminate the exterior and make it visible at night to help visitors navigate after dark. For homes with large soffits or overhangs beneath the roof, install some discreet lights in these areas to help define the roofline after dark.

Update The Driveway

Instead of a plain, asphalt driveway, consider more decorative options including stamped concrete pavers or bricks to add a finishing touch.

Replace Garage Doors

Often, standard garage doors don’t enhance a home’s appearance. Consider replacing garage doors with something more decorative, such as carriage style doors, carved doors, or contemporary style doors to create a fresh look.

Enlarge the Entryway

For many styles of homes, such as ranches, which have small, undefined entry areas, a new trend is to create a larger, more welcoming front door area. This may include building a “tower” such as those seen on Colonial style homes, or merely widening the front steps and adding some glass inserts on either side of the door.

Dress Up Walkways

Make the area leading up to your front door just as welcoming and attractive as the rest of your home. Widen the walkway itself, and invest in some new material such as stamped concrete pavers to create a more intricate and detailed path. You can also include built-in seating or conversation areas to increase the versatility of your landscaping and add interest to the area as well. Make sure you include some additional lighting in this area, possibly by including lights low to the ground that can unobtrusively light the path without taking away from its style at night.

Chimney Caps

Top your chimney to protect your home from elements and small animals. Consider using a decorative cap made of stone or wrought iron to call attention to your chimney and to dress up your roof.

Fences

Fences can add value to your property, they help keep children and pets safe, adding to curb appeal.

Do you want to remodel your bathroom?

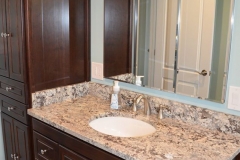
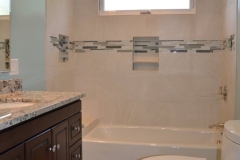
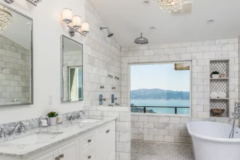
Bathroom Remodel: Set up your bathroom just the way you want. You can finally have the bathroom you’ve always wanted. We will work with you every step of the way to make sure our work reflects exactly what you had in mind. We’ll get the job done with as little interruption of your daily life as possible.


Here are things to consider before  remodeling your bathroom, whether you have a simple powder room or a master en suite, functionality should be at the heart of your bathroom remodel.  Gain more storage, improve lighting and drainage, and more to ensure that your renovated bathroom stands the test of time.

Plumbing: Residential plumbing typically uses 1½-inch pipes for drains. You’d be surprised how much gunk and hair goes down that drain. The larger the drain, the less likely it is to clog. The cost difference to upgrade to a 2-inch drain is practically negligible, and unless your framing doesn’t allow for it, you should consider increasing the drain in your shower to 2 inches.

Lighting: Consider recessed light fixtures to brighten up the bathroom. Install a dimmer switch so you can adjust the mood in your bathroom. Consider how you’ll be using the mirrors and whether you want aesthetic or functional lighting. Bright light fixtures go a long way to help you see what you’re doing close up.

Medicine cabinets: Plan for adequate space to recess your medicine cabinet is a great way to save a few inches of space over a shallow vanity, and the additional framing typically isn’t going to break the budget. If that’s not an option, ensure that you have enough room at your vanity to have your medicine cabinet protrude by 4 to 5 inches.

Wall-hung toilets: These fixtures have grown in popularity lately, and for good reason. They no longer break the bank, and they also save space since the tank is hidden behind the wall. However, if you ever change your mind and opt for a floor-mounted unit, you’ll have to rework the water supply and drainage.

A window in the shower: This is a great feature. Choose a frosted-glass panel for privacy and preferably one that opens for fresh air. Make sure there are stone jambs along the entire installation so that this area is watertight and that the sill slopes  down and away for proper drainage. Specify a tilt-and-turn window in the shower, because the screen is located on the outside of the window; the handles are plastic, so they won’t rust; and make sure the window provides full privacy even when tilted open.

Shower sills. Ensure that they are sloped properly into the shower. Choose a material that is solid, like stone or quartz. If you tile your shower curb, water can sit on the grout lines and eventually seep through to the framing.

Shower floors: Larger tiles are typically more difficult to slope properly, and unless they’re textured, they’ll be slipperier because the grout lines are further apart. Smaller tiles, whether textured or not, offer more traction and are typically the norm for shower floors.

Shower bases: Gone are the days of boring beige prefabricated shower bases. Use shower systems that have modern, clean bases made out of acrylic or porcelain. Consider all the options.

Drawer storage. Consider installing a vanity with drawer storage rather than doors. Drawers are easier to access and easier to organize. They can be cut out around the plumbing and can be extra large to accommodate large items.

Shower or tub? Before you decide, consider how many baths you take a year. The renovation is not for a future buyer, but for yourself. Even if you live in your house only for another five years, it’s worth it to do it for yourself. 

Scroll to top